Mirrors Mirrors on the Walls
March 15, 2019 § 2 Comments
I’ve been reflecting a lot lately on mirrors. (Sorry, had to to that.) I love mirrors in decorating. Not only do they bring much needed natural light into a dark room, but they create an illusion of space and even act as art if hung in groupings on a focal wall or along a stairwell.
But sometimes a mirror just doesn’t work. Here are a few tips for placing mirrors that might help you better appreciate them in your home.
- Avoid reflecting light back out the front door.
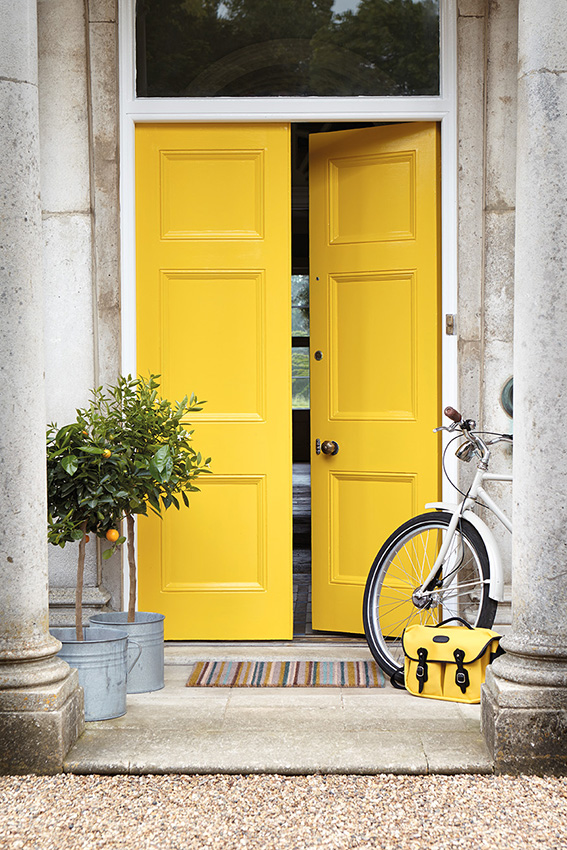
This is feng shui (it is not good to reflect the chi back out the front door), but it does make decorating sense. Putting a mirror at the front entry so you see yourself entering the home misses the opportunity to see and greet your guests with a beautiful piece of art instead. Just move the mirror to another wall in the entry and you will still add light to the space.
- Make sure the mirror reflects something positive.
Nobody wants to see your kitchen sink full of dishes reflected in the living room mirror. Make sure you place the mirror where it reflects a window or art on another wall in the room.
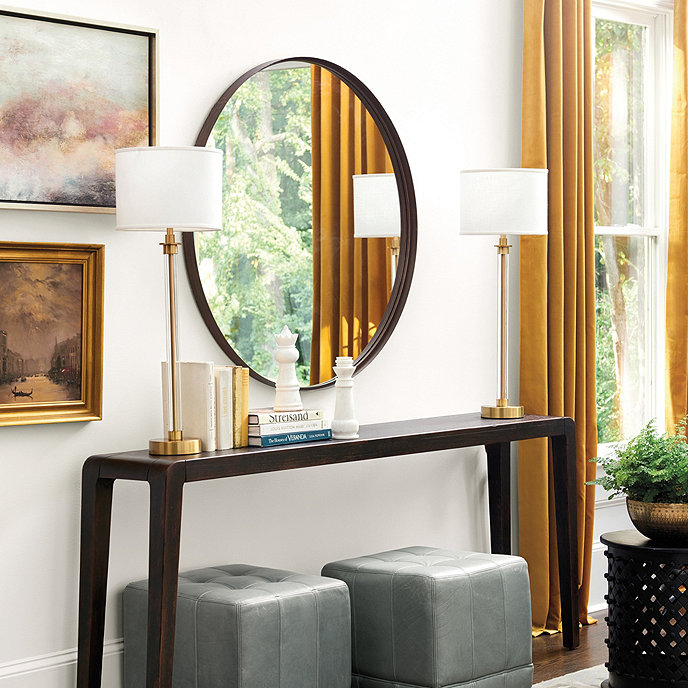
- Hang mirror over the fireplace instead of tilting it on the mantel.
What happens when you tilt a mirror on the mantel is that it most likely will reflect your ceiling and that’s it. If you hang the mirror, it will reflect the rest of the room and will double the space. Also, just an aside… if you are staging your home to sell, a mirror in the living room is good luck because potential home buyers who see themselves in the home tend to buy it (not a scientific fact, but it has worked so far!).
- Hang bathroom mirror so you can see into it.

It’s okay to let the mirror overhang the bead board (or backsplash tile) as long as you and others can see into the mirror while standing in front of the sink. Although visually, you might be tempted to hang the mirror clearly on the drywall (above the trim work in this photo), in a bathroom, form follows function.
- Make art with groupings of mirrors.
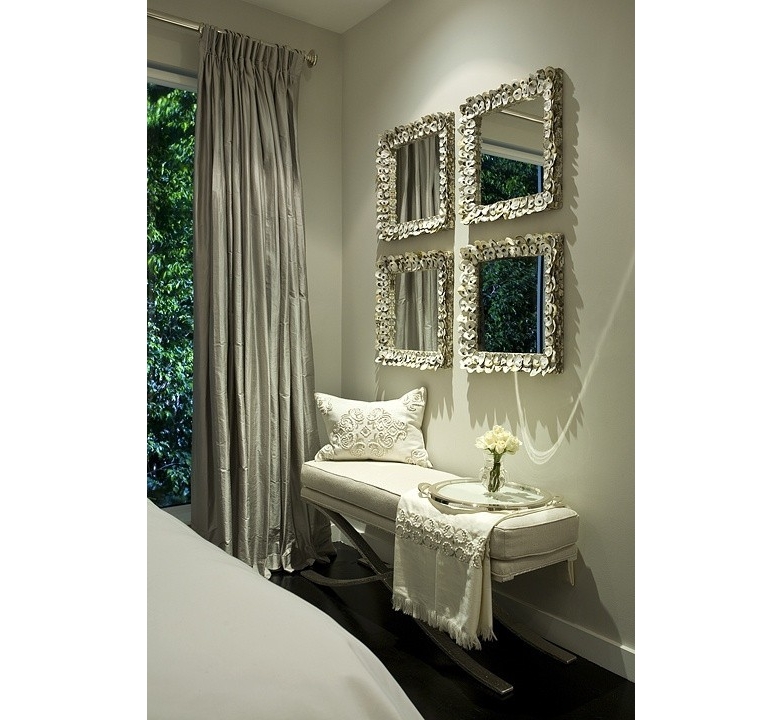
Organizing and hanging your mirrors either by matching shapes or frames (or both as above) or creating a random display of your mirror collection creates a unique focal point on the wall. Especially fun in a bedroom, stairwell or hallway that needs additional light but where the function of each mirror is secondary to its artistic arrangement.
Place your mirrors strategically to maximize their impact on the room. And for hanging really heavy mirrors, make sure you find at least one wall stud to secure the mirror onto the wall.
Mirror mirror on the wall. Be the smartest mirror-hanger of all!
Clutter is Such an Ugly Word
April 12, 2016 § 5 Comments
Is anybody else overwhelmed by clutter but put off by all the organizing gurus pointing out what a shambles our closets are in? Maybe I’m taking this too personally. After all, nobody has actually seen my closets. Isn’t that what doors are for??
Anyway… with Spring here, I feel compelled to get some order out of chaos. But at the same time, I want to avoid beating myself up that things got out of hand. Here’s how I plan to proceed:
- Start small. I think I’ll make the beds. Although Martha Stewart says it’s a daily must-do, she does have a point. Coming into a room that has a made bed helps us feel in control. And that’s a positive first step.
- Accept that some clutter is okay. Instead of getting rid of all the papers on my desk in one big shredding frenzy, I think I will opt for a quick sort. I’ll put the loose stuff in a plastic bin and put it next to my desk or by the kitchen table with a big note that says “Get coffee. Sort.”
- Hug the “collector” in the family. Acknowledge that, if left to my own devices and dream home, I could be as organized as the pros. But many of us live in families with people who are, quite honestly, messy. And we are not going to change them by bullying them into picking up their socks. So I think it’s a good idea to worry about our own stuff first. My mother always told me, “Set a good example.”
- Invest in large trash bags. Many of the clothes in my closet date back to junior high. Ya think? Time to get honest with myself and try on the clothes if that will help. If the zipper rips, trash. If I don’t like the way it makes me look, give away. If I want that concert T-shirt for nostalgia only, into a labeled bin it goes. The closet may actually heave an audible sigh of relief.
- Bring the camera phone. Sometimes just taking a picture of an object will help set it free. Like the children’s height markers on the kitchen wall. Or the ticket stub from a 1982 Genesis concert. If the actual item is worth keeping, then throw it into a bin labeled, “Great Memories.” At least you’ll know where that kind of stuff is.
- Create a public-friendly lobby. Establishing an area of the house that can be maintained clutter-free, like the entrance and maybe the living room, serves several functions: People can pop in without throwing us into panic mode; we can go to that space and stand there a few minutes soaking in the clutter-free atmosphere; and we can set the tone for the relaxed living space we all crave. I’ll start by picking up the sneakers I keep tripping over.
- Throw open the windows. There’s something about fresh air that stimulates the urge to clean up. Embrace the feeling before it passes, as the urge to sit down and scroll Facebook can be just as strong.
So having procrastinated long enough, it’s time to shut the electronics off for 30 minutes and make a small dent in my clutter. If you’re struggling from stuff overwhelm, know you are not alone. Small victories will turn into big ones. Breathe and let’s get started.
*Bag (http://www.zappos.com/dogeared-too-much-stuff-tote)
Don’t Let Your Art Fade Away
February 17, 2014 § Leave a comment
 Old faded jeans and old faded glory aside, old faded artwork in your house is a No-Go. If you have art prints that have hung on the wall in your bright cheery living room for several years, take a close look at them. Do they have a blue-green aura to them? Are flowers that used to be red sort of a strange blue? Is there any red or pink left in the piece at all? No?? Then haul it down. It’s done. Off to the recycle bin. Use the frame for something new that will add life to your room. Just this next time, opt for glass that will prevent color-fading. It’s more expensive but worth every penny if you love your art and prints.
Don’t be stubborn. Love your faded jeans, but get rid of your faded art.
Do You Know How Easy This Is??
January 18, 2014 § Leave a comment
 This update, to state the obvious, is the easiest project short of rolling paint on a wall. So easy that many of you will skip over this post or roll your eyes that I’m even mentioning it. But just in case you are still looking at stained seat covers on your kitchen chairs, you have no more excuses.
- Turn the chair upside down.

- Take your handy-dandy screwdriver (yes, you should have your own) and twist out the 4 screws.
- Next, go to your local fabric store and pick out a nice pattern and color that will look good in your room.
- Buy 1 1/2 yards (of a 50-54″-wide) fabric. If you’re at JoAnn’s Fabrics and Crafts, go to the “Home Dec” section so the fabric is sturdy enough to hold up. You don’t want quilting cotton — too flimsy.
- Lay the fabric upside down on a large table or the floor. Place your seat upside down on the fabric and cut out the new seat cover, leaving at least a 2-3″ margin after you lift the fabric up to cover the sides of the seat. Cut the fabric. (Don’t stress about the cutting — the edges are not going to show.)
- Next. If you don’t already have a staple gun (sigh), you need one. So many uses.
- Pull the fabric taut over the seat and put one staple in the center front underside of the seat.
- Turn the seat around and pull the fabric taut again putting one staple in the center back underside of the seat. Repeat with the sides, making sure the fabric pattern is straight (turn the seat over and check).
- Then pulling the fabric taut, staple the fabric onto the seat, moving toward the corners. Fold the corner pieces and staple underneath.
- Trim the fabric excess. Turn the seat over. Place it back on the chair and put the screws back in.
VOILA!
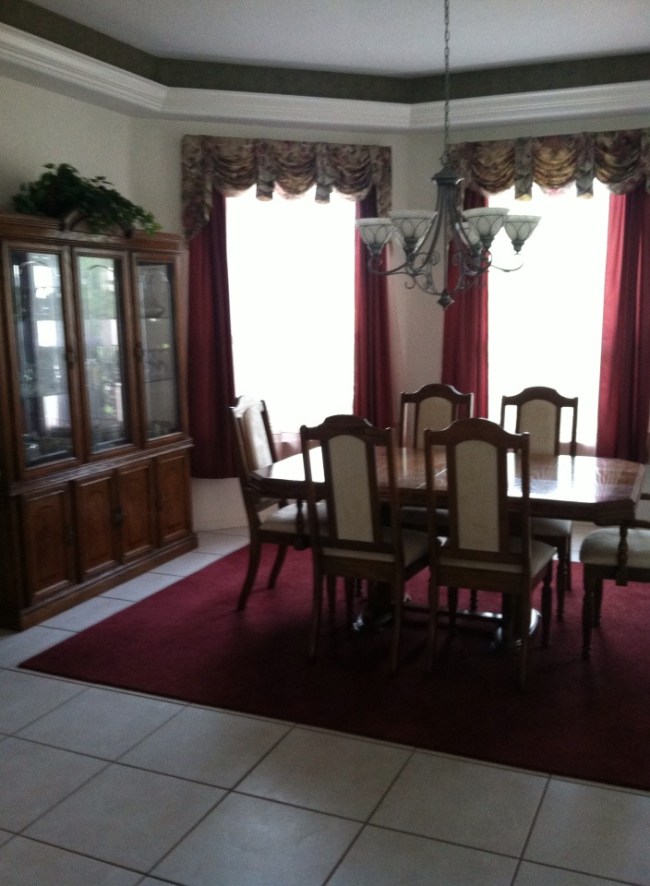
Home-Staging Tips That Help You Sell
January 17, 2014 § Leave a comment

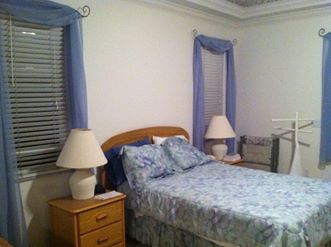
Tip 1: Make the Master Bedroom a cozy nest.
Remove outdated window treatments.
Dress the bed to look welcoming.
Add art above the headboard.
Make sure there is adequate lighting.
Tip 2: Clear the path to the room’s focal point.
Take away unnecessary furniture.
Remove dark window valances.
Rearrange furniture to feature focal area.

Tip 3: Remove styling that dates the house.
Less is more when you’re trying to attract young buyers.
Remove rugs to show off tile or hardwood floors.
Reorient furniture to add space.
Before shots:
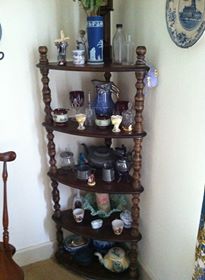
Clear Knick-Knacks Before Buyers Knock-Knock
January 16, 2014 § Leave a comment
 Attention Homeowners:
1) Are you planning to put your house on the market anytime soon?
2) Are you a collector?
If you answered YES to both questions, then I’m here to help.
Whether it’s a massive book collection in the living room, a rock collection in the study, or a porcelain collection in the corner curio cabinet, the very first step in preparing your home for the market is to
- Box up your collections.
You may think your treasures are carefully tucked away on high shelves away from onlookers, but collections, plain and simple, represent clutter and add to the perceived age of the house. Collections also draw the eye of the potential buyers away from the architectural features of the house (what you want them to see) and focus the buyer’s attention on your hobbies. What they most likely will remember about your house will be the collections and not the house.
Another even more practical reason to box up your collections is so that nothing will get broken. Potential buyers and their children wander through your house unaccompanied during an Open House, and a toy car collection will stimulate lots of interest, but not the good kind.
You do not have to strip the shelves completely bare. Empty shelves do not sell houses any better than over-stuffed ones. You can keep some books and larger accessories. As a rule of thumb, shelves should be about 2/5ths full. In other words, if you have a bookshelf with 5 shelves, 3 of them should be emptied and the remainder of the items redistributed. If you empty the entire bookshelf, then remove it from the room completely.
Hope that gets you started. Happy Selling!
5 Tips Your Realtor May Be Afraid to Mention
March 25, 2013 § 4 Comments
I’ll be blunt. The first thing a prospective buyer will notice upon entering your home is … (drumroll please)… the smell. If any peculiar odor is detected, it can kill a deal in the first minute. Or at least knock thousands off the price. So if you have carpets and plan to keep them and if you have pets, here’s my Number 1 t ip:
ip:
Hire a professional carpet and floor cleaner. It will make a huge difference. Not only will it rid your house of much of the odor, it will make one of the biggest selling features (your floors) look ready for buyers. Some other important tips:
Don’t burn fragrant candles or use air fresheners. A dead giveaway that you’re trying to mask some mysterious odors in the house. The best way to combat the smell is to clean from top to bottom and inside out, freshen the rooms with paint, and remove old carpets if possible.
Dehumidify your basement. Unless you have a completely dry basement with windows and doors that walk out into the yard, your basement will smell musty. Even if you’re not featuring a Man Cave, the basement needs to show itself to best advantage. Make sure it smells neutral.
Find a pet sitter for your animals. Whether it’s a litter box or a giant dog crate, the animal equipment detracts from the selling features of the house. And some people are actually allergic to cats. (Pet owners will not like this tip — but I’m just telling it like it is.) Move the animals to a friend’s house while you’re on the market — or at least for the Open House and the week following it.
Get rid of the dirty old furniture. This is a tough one for realtors as homeowners can take offense. But listen. Would you buy a house with a living room full of ragged recliners and tray tables? No. Remove the old furniture and let a home stager set up your living room to attract the most number of buyers. Your house will sell quicker if you stage it properly.
Tough love means a quick sale. You heard it here.
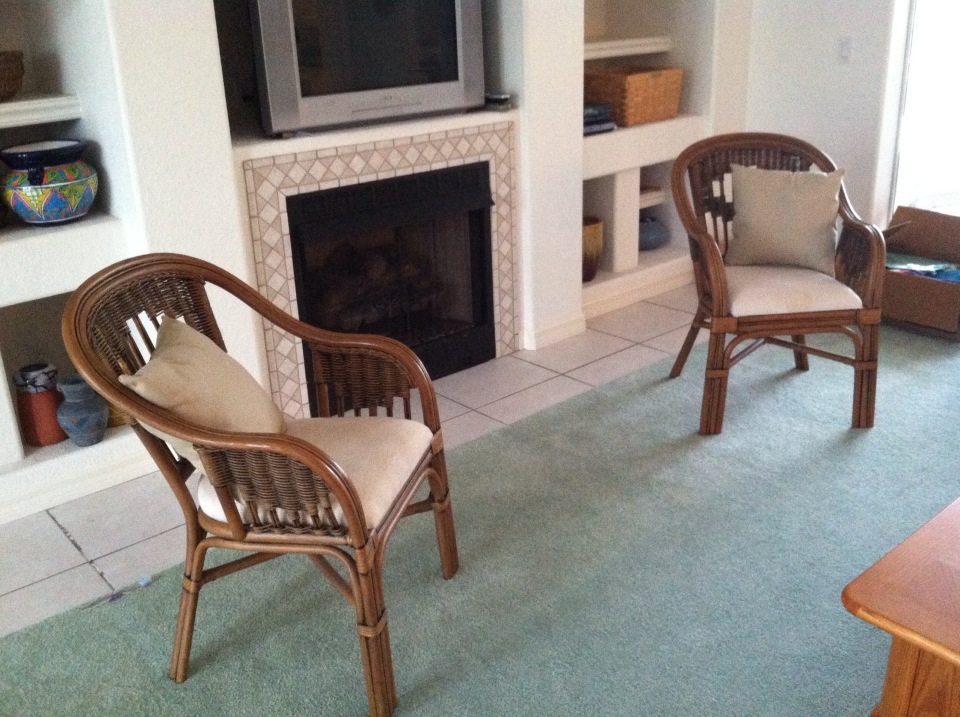
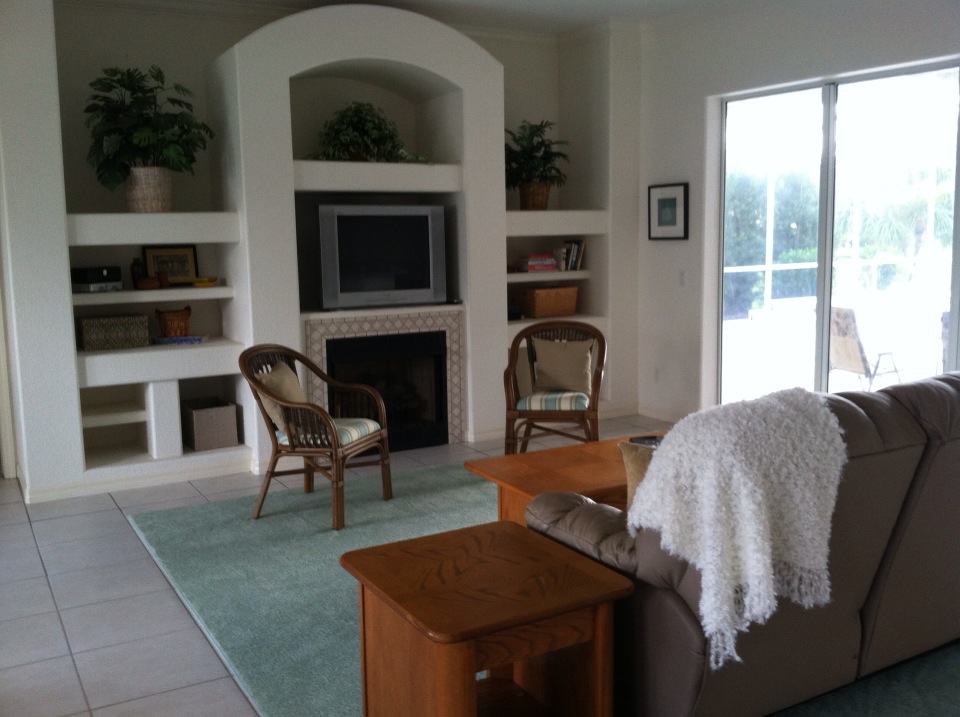
Furniture Arrangement Challenges May Call for Different Furniture
January 16, 2013 § Leave a comment
When it comes to furniture placement, some rooms just will not cooperate. With bay windows, bow windows, niches, dormers, and other odd architectural challenges, where on earth do you put your sofa? One solution is to forget the sofa altogether and replace it with a circular arrangement of very comfortable chairs, either all matching for a formal look or all mismatched for a casual eclectic look.
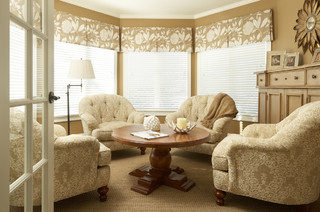
Either way, the arrangement gives you an instant, inviting seating area where you can sit down with others and have a cup of coffee or read the paper. In this photo, the designers put a round coffee table for holding popcorn, drinks, books, and just about anything else. But as you know, I’m a big fan of the big overstuffed ottoman– what I consider to be the perfect piece of versatile furniture– so that would be my choice for the center.
If you simply cannot figure out where to place your living room sofa, consider moving it to the family room or wherever the TV is. Replace the sofa/loveseat/chair concept with four comfy upholstered chairs. You’ll love the change.
Brick House Trim Colors
December 26, 2012 § 338 Comments

Creamy white trim with black shutters (and door) give brick houses like these on historic Nantucket Island in Massachusetts a classic traditional look that is timeless. But for a more contemporary look, use the brick itself for your trim color inspiration. Choose a color that you see in the brick or the grout– tan or taupe or another earthen color. If you select a color from the brick, it will blend with the brick and provide less contrast than the white. The overall effect will be soothing and contemporary but it will call less attention to the architectural details. The Boston building below is hardly contemporary, but the color scheme is taken from the brick and grout and is one example of using coordinating trim colors instead of contrasting trim.

Getting Down to Brass Tacks about Brass
December 11, 2012 § Leave a comment
What a difference a decade makes. What used to be the lighting 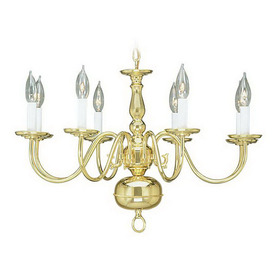 fixture of choice in upscale homes is now (still, even after several years out of favor) being tossed in a dumpster by young home owners who view the shiny yellow metal as the equivalent of how we viewed our grandmother’s dark brown paneling. Of no value.
Instead there are dozens of metal choices and finishes for lighting and other home accessories like light switch covers and doorknobs. So anti-shiny-brass are today’s home buyers that some are just shy of insisting that even all shiny brass door hinges be switched out to something else.
Note: these design trends may be regional and they don’t apply to historic homes so don’t panic if you love your brass chandelier and it fits your home’s decor perfectly. But If you are not happy with your shiny traditional yellow brass chandelier in your dining room or kitchen, you have three options:
1) Thumb your nose at metal color trends and simply wait for shiny yellow brass to come back in style. Kind of like you kept your go-go boots and bell bottoms from junior high. Yes, both trends came back around but not quite the way they looked in the late 60s. But still, doing nothing is always a design option.
2) Paint the shiny brass chandelier a different color. I once stood on a ladder, leaned over the dining table and painted my client’s brass chandelier first with a base coat of matte black to cover all the sheen and then a faux finish of browns and oranges to simulate a rustic bronze finish. It worked. The house sold.
3) Replace the old chandelier with a more current brass option like this one. The metal is toned down (antiqued) and the candelabra bulbs are covered with contemporary silk drum shades — a traditional yet updated look. Honestly, the antique brass has been around forever, and it went through a period of disfavor right around the time the shiny metal took over. But the muted finish, with updated shades, is back and looking good.

